How Is an Expansion Shell Anchor Bolt Installed in a Borehole?
2026-09-17
1. What Preparation Is Required Before Installing an Expansion Shell Anchor Bolt?
The installation begins long before the bolt is inserted into the borehole. The first step is to verify the borehole diameter and depth. The Expansion Shell Anchor Bolt is designed to fit a specific range of borehole diameters. If the hole is too large, the shell will not expand enough to grip the rock. If the hole is too small, the bolt will not fit. In our factory, we manufacture bolts for standard borehole diameters of 32 mm, 38 mm, and 45 mm. The hole depth must be at least the length of the bolt plus 100 mm to allow the shell to expand fully without bottoming out. The second step is to clean the borehole. Dust and debris at the bottom of the hole can prevent the shell from reaching the correct depth and can reduce the friction between the shell and the rock. We recommend blowing out the hole with compressed air or washing it with water before installation. The third step is to inspect the bolt and the shell for damage. The shell should be free of cracks and the threads should be clean.
Pre-installation checklist:
1. Borehole diameter within specification (e.g., 38 mm ± 1 mm).
2. Borehole depth at least bolt length + 100 mm.
3. Borehole cleaned of dust and debris.
4. Bolt threads and shell free of damage or corrosion.
5. Torque wrench and installation tool available.
2. What Is the Step-by-Step Procedure for Inserting and Tensioning the Bolt?
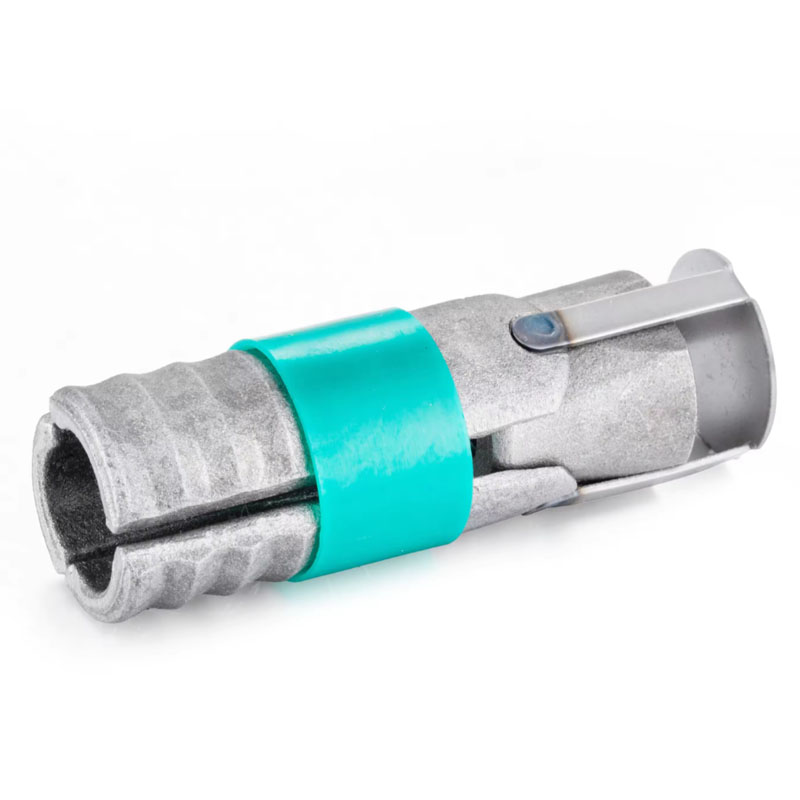
The installation procedure involves five steps. Step one: attach the expansion shell to the threaded end of the bolt. The shell is typically a two-piece or four-piece design that fits over a cone nut. Step two: insert the bolt into the borehole. Push the bolt to the full depth of the hole. If the bolt does not reach the required depth, remove it and check for obstructions. Step three: engage the installation tool. The tool is a socket or wrench that fits over the bolt head or the nut. Step four: apply torque. As the bolt is turned, the cone nut is pulled into the shell, causing the shell to expand and press against the borehole wall. The torque required depends on the bolt diameter and the rock type. The table below shows the typical installation torque for different bolt sizes.
| Bolt diameter (mm) | Recommended borehole diameter (mm) | Typical installation torque (Nm) | Minimum anchorage capacity (kN) |
| 16 | 32 | 80 – 120 | 50 |
| 20 | 38 | 120 – 180 | 80 |
| 22 | 38 | 150 – 220 | 100 |
| 25 | 45 | 200 – 280 | 120 |
Step five: verify the torque. Once the required torque is reached, the installation is complete. The bolt should be tight and the shell should be firmly anchored. In our factory, we recommend using a calibrated torque wrench for every installation. A torque wrench that is out of calibration can lead to under-tightening or over-tightening, both of which reduce the anchorage capacity.
3. How Do You Verify the Anchorage Capacity After Installation?
The most reliable method to verify the anchorage capacity is a pull test. A pull test involves applying an axial load to the bolt and measuring the displacement. The test is performed using a hydraulic pull test cylinder that is placed over the bolt. The load is applied gradually and the displacement is measured with a dial gauge. The acceptance criteria depend on the bolt size and the design requirement. Typically, the bolt should withstand a pull load of 50 to 80 percent of its minimum anchorage capacity without significant displacement. The table below shows the typical pull test acceptance criteria for different bolt sizes.
| Bolt diameter (mm) | Minimum anchorage capacity (kN) | Typical pull test load (kN) | Maximum allowable displacement (mm) |
| 16 | 50 | 30 | 2.0 |
| 20 | 80 | 50 | 2.5 |
| 22 | 100 | 60 | 3.0 |
| 25 | 120 | 75 | 3.5 |
If the bolt fails the pull test, it must be replaced. The failure could be due to a borehole that is too large, a shell that is damaged, or insufficient torque. In our factory, we provide a pull test kit with every order of Expansion Shell Anchor Bolt units. The kit includes the hydraulic cylinder, the pump, the pressure gauge, and the displacement gauge. We also provide a calibration certificate for the pressure gauge.
4. What Are the Common Installation Mistakes and How Can They Be Avoided?
There are four common installation mistakes that reduce the anchorage capacity of an Expansion Shell Anchor Bolt. The first is over-torquing. Applying more torque than recommended can damage the threads or cause the shell to crack. The second is under-torquing. Applying less torque than recommended means the shell does not expand enough to grip the rock. The third is using the wrong borehole diameter. A hole that is too large is the most common cause of bolt slippage. The fourth is failing to clean the borehole. Dust and debris can prevent the shell from reaching the bottom of the hole and can reduce the friction between the shell and the rock. To avoid these mistakes, we recommend the following: use a calibrated torque wrench, verify the borehole diameter with a gauge, clean the hole with compressed air, and train the installation crew on the correct procedure.
Field tip: If a bolt spins freely without reaching the required torque, the borehole is likely too large or the shell is not engaging. Remove the bolt, check the hole diameter, and if necessary, use a larger shell or a different bolt size. Do not continue to tighten a spinning bolt.
Frequently Asked Questions About Expansion Shell Anchor Bolt Installation
Summary for Field Technicians and Mining Engineers
The installation of an Expansion Shell Anchor Bolt is a process that requires attention to detail at every step. The borehole diameter, the hole depth, the hole cleanliness, the torque applied, and the pull test verification all contribute to the final anchorage capacity. A bolt that is installed correctly will provide reliable support for years. A bolt that is installed incorrectly may fail under load, creating a safety hazard. The procedures outlined in this guide are based on our factory's experience in supplying bolts to mining and tunneling projects in over 20 countries. Ningbo Supreme Machinery Co.,Ltd. has been manufacturing Expansion Shell Anchor Bolt units for over 15 years.
Ningbo Supreme Machinery Co.,Ltd. manufactures Expansion Shell Anchor Bolt units in a range of diameters and lengths, with shells designed for different borehole sizes and rock types. We provide installation guides, torque specifications, and pull test kits with every order.