How Do You Install a Butterfly Spring Toggle Bolt Anchor Step by Step
2026-09-22
Installing heavy fixtures on drywall or hollow walls requires an anchor that can distribute weight reliably behind the surface. The Butterfly Spring Toggle Bolt Anchor from Fixingmore is engineered for exactly this purpose, offering strong holding power in cavities where ordinary plugs would fail. This guide walks through each stage of installation, from selecting the right size to final tightening, so you can complete the job with confidence and precision.
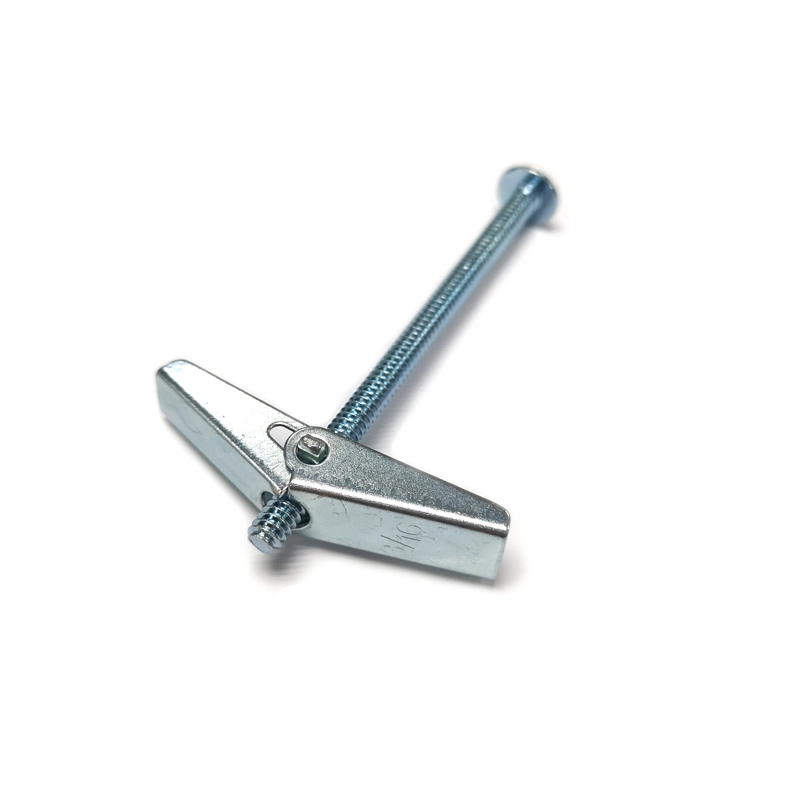
What Makes the Butterfly Spring Toggle Bolt Anchor Different
Unlike plastic expansion anchors that rely on friction, a Butterfly Spring Toggle Bolt Anchor uses a spring-loaded metal toggle that flares open behind the wall. This creates a broad bearing surface that resists pull-out far more effectively.
| Feature | Benefit |
|---|---|
| Spring-loaded toggle wings | Expands behind wall for secure grip |
| Machine screw with bolt head | Allows repeated tightening and removal |
| Zinc-plated steel body | Corrosion resistance for indoor and sheltered outdoor use |
| Available in multiple sizes | Matches different load requirements |
Fixingmore manufactures these anchors with strict tolerances, ensuring the toggle opens smoothly and the threads engage cleanly every time.
Tools and Materials You Will Need
Before starting, gather the following:
-
Butterfly Spring Toggle Bolt Anchor sized for your load
-
Drill with a bit matching the anchor diameter
-
Measuring tape and pencil
-
Screwdriver or socket wrench
-
Hammer (for tapping the toggle through)
-
Safety glasses
Step-by-Step Installation Guide
-
Determine the load and select the anchor size. Check the fixture weight and choose a Butterfly Spring Toggle Bolt Anchor rated above that load. Fixingmore provides clear load ratings on every package.
-
Mark the hole position. Hold the fixture against the wall and mark each mounting point with a pencil.
-
Drill the hole. Use a bit equal to the anchor's specified diameter. Drill straight and slightly deeper than the toggle length.
-
Insert the anchor. Push the toggle wings through the hole. If resistance occurs, tap gently with a hammer until the wings sit inside the cavity.
-
Position the fixture. Align the fixture holes with the protruding bolts.
-
Tighten the bolt. Turn the screw clockwise. The toggle will draw against the back of the wall, compressing the wings and locking the anchor.
-
Check the hold. Gently tug the fixture. If any movement exists, tighten further or inspect for wall damage.
Load Capacity Reference Table
| Anchor Size | Typical Drywall Thickness | Recommended Max Load |
|---|---|---|
| 3/16 inch | 3/8 to 1/2 inch | 25 to 40 lbs |
| 1/4 inch | 1/2 to 5/8 inch | 50 to 75 lbs |
| 5/16 inch | 5/8 to 3/4 inch | 80 to 100 lbs |
Always apply a safety margin and never exceed the manufacturer's stated capacity.
Common Installation Mistakes to Avoid
-
Drilling an oversized hole, which prevents the toggle from seating properly
-
Over-tightening and crushing the drywall surface
-
Using a Butterfly Spring Toggle Bolt Anchor in solid concrete or brick
-
Reusing an anchor after removal without inspecting the wings
Frequently Asked Questions
Q: Can a Butterfly Spring Toggle Bolt Anchor be used in a ceiling?
A: Yes, a Butterfly Spring Toggle Bolt Anchor is suitable for ceiling applications when the load is within the rated capacity, because the toggle spreads force across a wide area behind the drywall.
Q: How do I remove a Butterfly Spring Toggle Bolt Anchor without damaging the wall?
A: Loosen the bolt several turns, then push the fixture inward so the toggle wings collapse, and pull the anchor out slowly; if the toggle does not release, cut the bolt flush and patch the hole.
Q: Is a Butterfly Spring Toggle Bolt Anchor stronger than a plastic wall plug?
A: Yes, a Butterfly Spring Toggle Bolt Anchor generally holds significantly more weight than a plastic plug because the metal toggle creates a larger bearing surface inside the wall cavity.
Final Thoughts and Contact
Choosing the right anchor and installing it correctly protects both your fixture and your wall. With the steps above and a trusted Fixingmore product, you can achieve a secure, professional result every time. For bulk orders, technical data sheets, or personalized anchor selection advice, contact us today and let our team help you find the perfect fastening solution for your project.